Dungeon Dash Locations
From Zedwiki
Much of the dungeon is procedurally generated, but some rooms are not. On each floor, you will encounter a few specially designed rooms, culminating in one of two boss rooms at the end of each floor. These rooms tend to be longer and more dangerous than most other rooms throughout that floor.
Floor 1
Shop
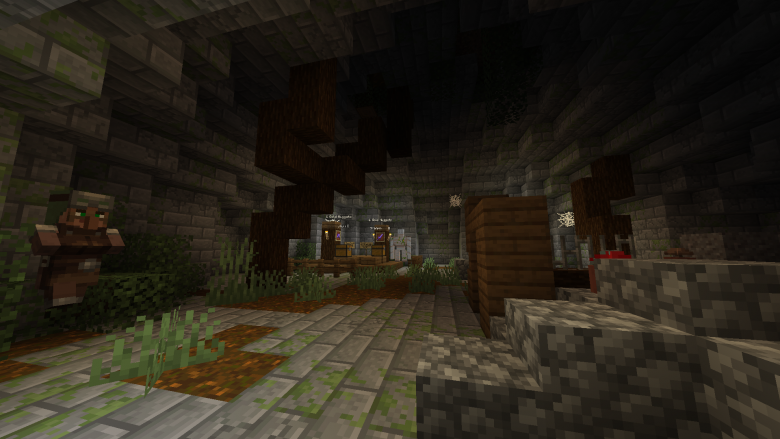
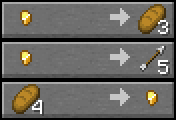
The first floor's shops have two items for sale, usually of iron quality with minimum enchants, and a villager that buys and sells bread, as well as selling arrows. Two trees sprout up from the center of the room, the taller of which you can parkour up to find a loot chest in the ceiling. Another loot chest sometimes spawns at the base of the parkour tree, and a mimic can sometimes spawn at the base of the other. A small, broken down structure is in one of the corners, which can contain a mimic, and will always have a chest containing 4 mushroom stew and 3 empty bowl.

Spider Room
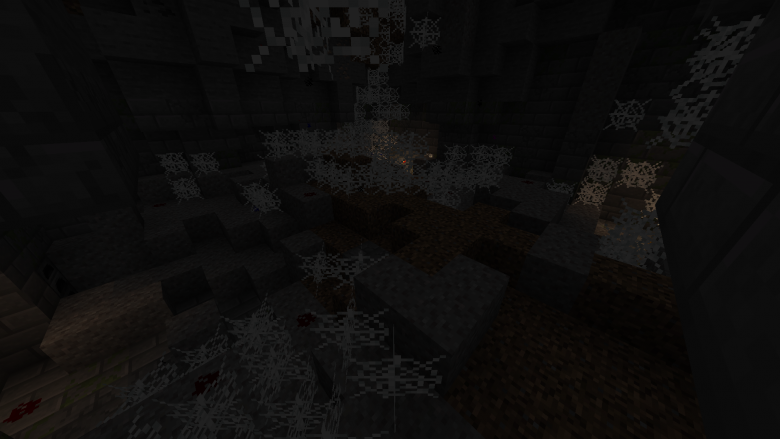
A very dark room with a caved in roof. Gravel, cobwebs, and normal spiders are all around the room. Several smaller rooms come off to the sides of the main one, some containing loot chests and mimics. On the wall alongside the entrance are two furnaces containing mutton which, due to an oversight, gives strength when eaten. The exit is at the corner opposite the entrance.
Guardian Room
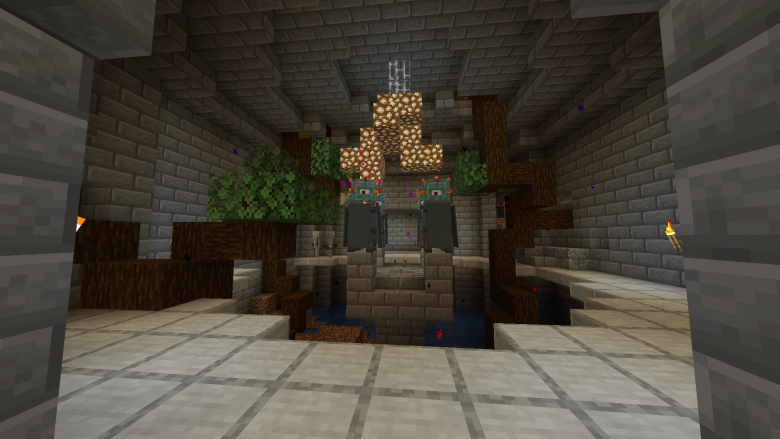
This room contains a pool of water below, with platforms on either side, and trees growing from the walls. Another platform is in the center, which has 4 guardians on top of it. Above is a small parkour challenge leading to a loot chest. On the opposite side, there are loot chests, skeletons, and 2 exit doors on the opposite corners.
Forest Room
A large overgrown room full of trees and podzol. Zombies with cave spider heads, and dwarf slime jockies can be found inside. To the left of the entrance are loot chests hidden in the trees. Straight ahead is a cave with a pool, leading to the exit. To the right, there is a parkour challenge which allows you to skip the majority of the cave section, and drops you nearly at the exit.
Flood Room
The flood room is a 2 floor complex, with the bottom floor being full of water. Several holes in the first floor allow players to come up for air. Before descending into the flooded area, there is a hole in the wall with 2 loot chests, and sometimes a mimic. A way up to the main level can be found at the corner opposite to the entrance. Normal zombies and skeletons are on the main floor, along with several loot chests.
Corridor Room
This room starts off with a three way split, going to the left, forward, and to the right. The left path has a trapped chest which will start to close in the walls if you are not quick. The middle path has a dark area of skeletons which will shoot at the player as they run through. Both of these paths lead to a cave in leading to an upper level. The right path has several dispensers with poison arrows activated by tripwires, followed by a staircase. On the upper level, there are two small library sections containing skeletons and loot boxes. A staircase down leads to a final tripwire-activated dispenser and the exit.
Cave Section
A large, dark cave, with no enemies throughout. Several chests with placeable torches appear regularly. Hidden about halfway down is the Sword of the Prince, a golden sword with Smite IV and Fire Aspect 2. At the bottom of the cave, there is a locked door. Unlock it by finding the golden pressure plate in a side area at the bottom. While the door unlocks, a large amount of zombies will fall from the ceiling outside of the area with the pressure plate. The door will open when all the zombies are dead.
Strategy
Grab the Sword of the Prince on the way down. If you are playing as Hunter, place a trap just outside the pressure plate area, and trigger it. After the pressure plate is triggered, run outside and start killing zombies using the Sword of the Prince. If you are playing as Soldier, use your firebomb once the zombies have stopped spawning. If you are playing as Tank, run in and use your armor burst. Mages can summon a Rusty if they feel necessary. Berserkers and Soldiers can use their class abilities to make their job a bit easier.
Cultist Stronghold
This section starts off with Guardians outside the entrance. Just inside, there is a large skull with Guardians in the eyes. Below this, there are several normal loot chests and a staircase downwards. Around the staircase are several Guardians. After the drop, there is a cryptlike area full of Cultists. Several paths around the entrance lead to a netherrack filled room with an iron door on a gold block with a button. Press that button to unlock the rest of the area. There are several normal loot chests around the crypt, and usually many just before the exit.
Strategy
Run past the Guardians at the entrance, grab the loot chests, and drop down into the crypt. Ignore the Guardians around the staircase. After the drop, this is more or less like any other room in the dungeon.
Floor 2
Magma cube room, Zombie villager room, Maze room, Puzzle door room, Illusioner room, Shop room, Sword Inferno room, Wooden illager room
Cathedral Room
This room starts off with a long hallway behind a broken down barricade. Closed iron doors on the right will open after a player passes a certain point, releasing Vindicators. There are sometimes loot chests in the rooms on the right. After that, there is a long staircase down, which opens up into a large room with a table in the center. Vexes will spawn when a player reaches the bottom of the staircase. On the side opposite the entrance, there is a hallway which can contain loot chests. Around the table, there are Evokers and Illusioners. Around the room, there are four entrances leading into a basement area, populated with Vindicators. There are four rooms in the basement, one containing anvils, another containing a chest with food, and another with instant health and damage potions. Each room also contains a lever on a gold block. Flip them all to unlock the next floor.
Strategy
Have someone run in and out to trigger the Vindicator trap. If you are playing as Hunter, place a trap just past the barricade. Snipe the Vindicators from the entrance, grab the loot chests, and move down. Many of the Vexes spawned at the bottom of the staircase will not attack, and float down into the room below. Snipe the ones that do, and move down near the table. Snipe the Evokers and Illusioners from above if possible. Once they are all dealt with, carefully move into the basement. Keep a bow drawn to deal with any sneaky Vindicators. Grab all the loot and use the anvils to improve your gear. Flip the levers and move on to the next floor.
Hell Room
There are two entrances to this room, each containing a staircase up to a larger room. Above, the room contains an Evoker and a Witch, along with many skeletons and some Blazes. In the middle of this room is a portal of End Gateway blocks. Past that is a netherlike room with blazes and some hidden loot chests. A staircase leads to a drop down into the next area, where there are Vindicators and more Blazes. Another portal in the floor leads to the final area. There are two sections, one containing several Vindicators, with lots of food, gold, and arrows, and the other containing an Evoker and anvils. At the end of these sections are buttons on gold blocks. Press them both to unlock the next floor.
Strategy
Clear out the staircases before moving into the Evoker room. Snipe the Evoker and the Witch from the sides, then move down into the hell area. Snipe the Blazes, grab the loot chests on the sides of the room, and move down. Snipe the Blazes and Vindicators, grab the loot chests, and move on. Snipe the Evoker from the staircase and press the button, then do your best to snipe the Vindicators on the other side. Press the button, collect the food, gold, and arrows from the chests (and the furnaces), improve and repair your gear with the anvils, and move on.
Floor 3
Stoneface cave (drop into water), Double path stoneface cave, lava bridges, trap chest room, ghouls and banshees, save martin, parkour room,
Spider Room
A staircase leads up to a beat up room, full of spiders and cave spiders. Past that, the room opens up into a spiderweb filled cave, before leading down to the bottom, where there is a pool containing Guardians, with a run down library and kitchen on either side. In the middle of the room, there is a gateway of cobblestone walls and iron bars, with pressure plates behind them. Past the gate, there is also a hidden chest above a gravel collapse. Trigger the pressure plates to open the next floor.
Strategy
This room is living hell. Do your best to get at least a Power 3 bow before starting, as this will 1-shot cave spiders, which are the main problem. Mage's Rustys, Soldier's Firebombs, Hunter's traps, and Tank's armor bursts all do well here. Make sure to keep saturated, since you will likely be poisoned for a good portion of the time in this room. Try to kill all the spiders before moving on to the next section, but you can for the most part ignore the Guardians.
Four Horsemen
The top of this area has two rooms with loot chests, before a wooden spiral staircase leading downwards. At the bottom, there is a large dirt room containing an altar with buttons. Press the buttons to summon the Four Horsemen of the Apocalypse. Death is a skeleton wearing diamond armor, who will shoot instant damage arrows. Pain is also a skeleton, but wears gold armor and shoots poison arrows. War and Famine are both axe-wielding zombies in iron armor. Famine will inflict hunger on the player when hit. When all the Horsemen have been killed, holes will open up in the floor. Below is a water filled room containing many loot chests and some potions. Press the button near the doors to open the next floor.
Strategy
There are two viable "cheesy" strategies for the Horsemen. The first is to stay on the staircase, above where it is broken, and snipe the Horsemen from there. You can trigger the fight to start by shooting the buttons on the altar. Another option is to stockpile ability juices, and have a hunter place traps around the arena before starting. Both of there have minimal risk, but are not all that interesting. If you decide to do the fight legitimately, War and Famine are usually easier targets than Pain and Death. Arrows are your friends here, using melee is usually dangerous. Beat up on War and Famine, then gang up on Pain and Death one at a time. Drop down, collect your loot, and prepare for the final boss.
Floor 4
Ripper
Click to see information on Ripper.
Apophis
Click to see information on Apophis.
| Dungeon Dash | ||
|---|---|---|
| Classes | Soldier | |
| Equipment | Relics | |
| Locations | 1st Floor • 2nd Floor • 3rd Floor • Boss Floor | |
| Monsters | Cultists • Ghosts • Illagers • Spiders • Bosses (Ripper • Apophis • The Archivist • Sinister Sisters) | |


